


Every ride leaves a mark on your bike. Mud, dust, road grime, moisture, sweat, and debris slowly wear down components even if the bike still looks rideable from a distance.
The Complete Post-Ride Bike Care Routine Every Rider Should Follow
Every ride leaves a mark on your bike. Mud, dust, road grime, moisture, sweat, and debris slowly wear down components even if the bike still looks rideable from a distance. Riders often focus on upgrading tires, drivetrains, suspension, or frames while overlooking one of the most important habits for long-term performance: consistent post ride bike maintenance.
A proper bike cleaning routine does far more than improve appearance. It helps protect expensive components, maintain shifting performance, reduce drivetrain wear, prevent corrosion, and extend the lifespan of your bike. Whether you ride mountain bikes, gravel bikes, road bikes, or e-bikes, developing a structured bicycle care checklist can save money and improve ride quality over time.
Modern riders are also thinking beyond maintenance alone. High-value bikes increasingly require better cleaning systems and smarter protection strategies. That means combining efficient washing tools, detailed cleaning kits, and discreet security upgrades into one complete workflow.
This guide covers the complete post-ride bike care routine every rider should follow, from the first rinse after a muddy trail ride to the final protection and storage steps that keep your bike ready for the next adventure.
Why Post Ride Bike Maintenance Matters
Many riders only clean their bikes when they become visibly dirty. Unfortunately, damage often starts long before grime becomes obvious. Dirt and moisture can gradually affect drivetrain efficiency, suspension performance, braking consistency, and bearing longevity.
A neglected bike can develop:
- Premature chain wear
- Rust and corrosion
- Poor shifting performance
- Brake contamination
- Suspension seal damage
- Frame scratches from trapped grit
- Reduced drivetrain efficiency
Regular cleaning also makes it easier to spot issues before they become expensive repairs. Cracks, worn tires, loose bolts, and damaged cables are easier to identify on a clean bike.
The goal of post ride bike maintenance is not simply cosmetic. It is preventative care that protects performance and long-term reliability.
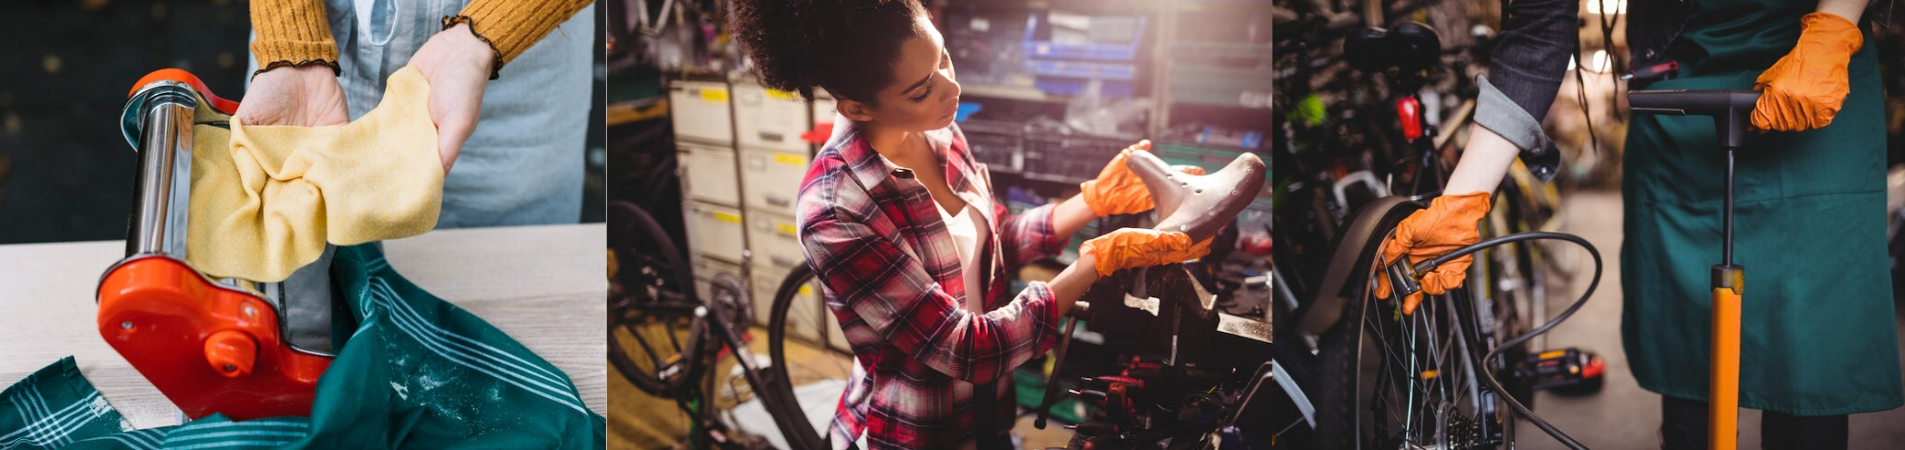
Step 1: Start With the Right Cleaning Setup
One reason riders avoid cleaning their bikes regularly is because traditional washing methods can feel time-consuming and messy. A modern cleaning setup simplifies the process significantly.
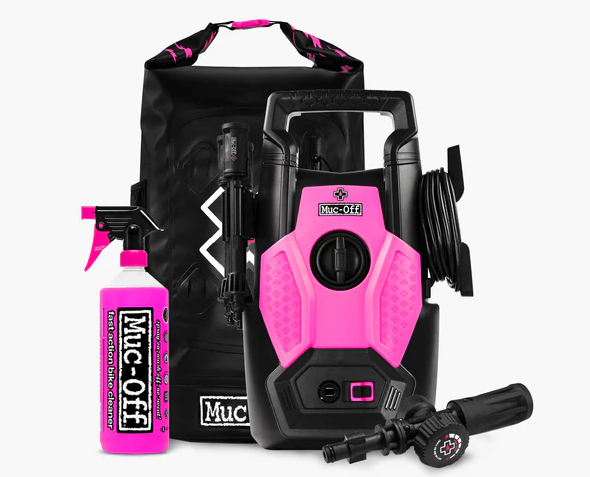
Using a bike-specific pressure washer system can dramatically reduce cleanup time after muddy rides while remaining safe for sensitive bike components.
The Pressure Washer Nano Bundle is designed specifically for bicycles and motorcycles, offering controlled pressure that helps remove mud and grime without the excessive force associated with industrial pressure washers. This makes it ideal for riders who frequently deal with trail mud, wet weather, gravel dust, or winter road conditions.
A proper cleaning station should include:
- Bike-specific pressure washer
- Foam or bike cleaner
- Soft cleaning brushes
- Drivetrain cleaning tools
- Microfiber cloths
- Lubricants and protectants
Having everything organized in one place makes it easier to stick to a consistent bike cleaning routine.
Step 2: Initial Rinse and Mud Removal
The first stage of how to clean a mountain bike properly is removing loose dirt and mud before detailed cleaning begins.
Start by placing the bike in a stable position or repair stand. Use the pressure washer to rinse off heavy debris from:
- Tires
- Forks
- Frame
- Suspension linkage
- Chainstays
- Wheel wells
- Drivetrain area
The key is controlled cleaning rather than blasting components aggressively. Bike-specific pressure systems help reduce the risk of forcing water into bearings or suspension seals.
This stage prevents grit from scratching paint or damaging components during the next cleaning steps.
Riders who frequently ride muddy trails know how quickly debris can build up around suspension pivots and drivetrains. Early removal makes the rest of the process faster and safer.

Step 3: Apply Bike Cleaner and Foam
Once major debris is removed, apply bike cleaner or snow foam across the frame and components.
Foam-based cleaners help loosen stubborn dirt while reducing the need for aggressive scrubbing. Let the cleaner sit for a few minutes to break down grease, oils, and grime.
Focus particularly on:
- Bottom bracket area
- Cassette
- Chainrings
- Rear derailleur
- Brake calipers
- Suspension pivots
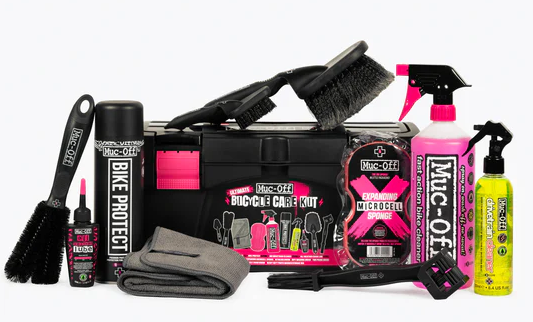
This is where a complete cleaning solution like the Ultimate Bike Cleaning Kit becomes valuable. Instead of piecing together random cleaning products, riders can use dedicated bike-specific tools designed for various surfaces and components.
Bike-specific cleaners are also safer for:
- Carbon frames
- Matte finishes
- Suspension seals
- Disc brake systems
- Anodized parts
Avoid household degreasers or harsh detergents that may damage finishes or strip lubrication.
Step 4: Deep Clean the Drivetrain
The drivetrain is one of the most important parts of any bicycle care checklist. Dirt buildup on chains, cassettes, and chainrings increases friction and accelerates wear.
A dirty drivetrain can reduce pedaling efficiency while shortening the lifespan of expensive components.
Start by cleaning:
- Chain
- Cassette
- Rear derailleur pulleys
- Front chainrings
Use dedicated brushes and drivetrain cleaning tools to remove grease and grime from hard-to-reach areas.
For mountain bikes and gravel bikes, drivetrain cleaning is especially important after wet or dusty rides. Fine grit acts like sandpaper inside moving components, gradually wearing down metal surfaces.
Pay close attention to:
- Black buildup around cassette teeth
- Mud trapped between pulley wheels
- Dirt inside chain links
Thorough drivetrain cleaning improves:
- Shifting smoothness
- Chain lifespan
- Drivetrain efficiency
- Pedaling consistency
This step alone can significantly reduce maintenance costs over time.
Step 5: Clean the Wheels and Tires
Wheels and tires often carry the heaviest dirt buildup after a ride. Cleaning them properly helps preserve tire performance and keeps brake systems functioning correctly.
Use soft brushes to clean:
- Tire tread
- Rims
- Hubs
- Spokes
If you ride tubeless setups, inspect tires carefully during cleaning.
Look for:
- Sealant leaks
- Embedded debris
- Sidewall cuts
- Worn tread
- Air pressure issues
This is also an ideal moment to integrate a smart security feature like the Tubeless Tag Holder.
Modern bikes are valuable investments, and theft protection is increasingly important for riders who travel, race, commute, or store bikes in public spaces. A hidden tag holder inside the tubeless setup offers discreet tracking integration without affecting the bike’s appearance.
Unlike visible trackers mounted externally, hidden solutions are less noticeable and harder to remove.
Combining cleaning and security inspection into the same routine helps riders build a more complete bike ownership system.
Step 6: Detail the Frame and Components
Once the heavy cleaning is complete, move into detailing.
This stage focuses on:
- Removing leftover grime
- Polishing surfaces
- Cleaning tight spaces
- Protecting finishes
Use microfiber cloths and detailing brushes to clean:
Suspension crowns
- Head tube areas
- Seat stays
- Brake mounts
- Cable routing zones
Detailing helps reveal hidden wear or damage that may otherwise go unnoticed.
Check for:
- Paint chips
- Frame cracks
- Loose bolts
- Cable rub
- Suspension oil leaks
Riders with carbon bikes should inspect carefully around high-stress areas.
A clean bike also creates a psychological advantage. Riders often feel more motivated and connected to equipment that is well maintained and visually cared for.
Step 7: Dry the Bike Properly
Many riders rush through drying or skip it entirely. Moisture left on the bike can contribute to corrosion and contamination.
Use clean microfiber towels to dry:
- Frame surfaces
- Chain
- Bolts
- Suspension areas
- Brake rotors
- Drivetrain components
Compressed air or bike dryers can help remove trapped water from tight spaces.
Pay extra attention after wet weather rides or winter riding conditions.
Water left inside:
- Drivetrain areas
- Bolt heads
- Suspension pivots
- Cable housing
can create long-term maintenance problems if ignored repeatedly.
Proper drying is a simple but critical part of post ride bike maintenance.
Step 8: Lubricate Moving Parts
Once the bike is clean and dry, lubrication restores smooth performance and protects moving components.
Apply lubricant carefully to:
- Chain
- Derailleur pivots
- Pedal springs
Suspension pivot points where appropriate
Choose lubricants based on riding conditions:
- Wet lube for muddy or rainy climates
- Dry lube for dusty conditions
After applying chain lube:
- Rotate the drivetrain
- Allow lubricant to penetrate
- Wipe away excess
Too much lubricant attracts dirt and creates buildup faster.
Proper lubrication improves:
- Shifting precision
- Pedaling efficiency
- Drivetrain lifespan
- Corrosion resistance
This step transforms a freshly cleaned bike into a ride-ready machine.
Step 9: Perform a Quick Safety Inspection
A clean bike makes inspection easier and more accurate.
Before storing the bike, conduct a quick safety check:
- Tire pressure
- Brake function
- Rotor alignment
- Chain wear
- Suspension pressure
- Bolt tightness
- Wheel alignment
This simple habit can prevent ride-day surprises and identify problems before they worsen.
Many riders discover:
- Loose thru-axles
- Cracked sidewalls
- Worn brake pads
- Bent rotors
during routine cleaning rather than during rides.
Combining maintenance and inspection into one workflow saves time while improving safety.
Step 10: Protect and Store the Bike Correctly
The final stage of the bicycle care checklist involves proper storage.
Even a perfectly cleaned bike can deteriorate if stored carelessly.
Store bikes:
- Indoors whenever possible
- Away from moisture
- Away from direct sunlight
- In stable temperatures
Avoid leaving bikes wet inside garages or vehicle racks for extended periods.
If you travel regularly with your bike, security should also become part of the storage routine.
This is where hidden tracking solutions provide extra peace of mind. Integrating a Tubeless Tag Holder into your setup helps protect valuable bikes during:
- Travel
- Race weekends
- Hotel stays
- Public parking
- Apartment storage
Modern cycling increasingly combines maintenance and smart protection rather than treating them separately.
Building a Sustainable Bike Cleaning Routine
The best bike cleaning routine is the one riders can consistently maintain.
Not every ride requires a full deep clean, but regular upkeep prevents small issues from becoming major repairs.
A simple structure works well:
- Quick rinse after light rides
- Full wash after muddy rides
- Weekly drivetrain inspection
- Monthly deep clean
- Seasonal maintenance check
Riders who clean bikes consistently often spend less money on replacement parts over time.
The key is efficiency. Having a dedicated cleaning system, organized tools, and a repeatable process makes maintenance feel manageable rather than overwhelming.
Common Bike Cleaning Mistakes to Avoid
Even experienced riders sometimes damage bikes through improper cleaning methods.
Avoid these common mistakes:
Using High-Pressure Industrial Washers
Excessive pressure can force water into bearings and suspension seals.
Using Household Detergents
Harsh cleaners may damage finishes or remove protective coatings.
Neglecting the Drivetrain
Ignoring drivetrain cleaning accelerates wear dramatically.
Over-Lubricating the Chain
Excess lubricant attracts dirt and creates buildup.
Storing Bikes While Wet
Moisture contributes to rust and corrosion over time.
Ignoring Small Problems
Cleaning is the perfect opportunity to catch issues early.
Why Modern Riders Need More Than Just Soap and Water
Cycling equipment has evolved significantly. Modern bikes feature:
- Carbon frames
- Electronic shifting
- Advanced suspension systems
- Tubeless tires
- High-end drivetrains
These components require better maintenance tools and smarter care systems.
Today’s riders are increasingly building complete bike care setups that combine:
- Efficient cleaning
- Protective detailing
- Performance maintenance
- Security upgrades
A bike-specific pressure washer improves cleaning efficiency. A dedicated cleaning kit helps protect components properly. Hidden tracking solutions add modern theft protection without affecting aesthetics.
Together, they create a complete ownership system rather than a basic cleaning routine.
Conclusion
Every ride exposes your bike to dirt, moisture, grit, and wear. Without regular maintenance, even premium components gradually lose performance and reliability.
Following a complete post-ride bike maintenance routine helps protect your investment while improving ride quality, safety, and long-term durability.
The process does not need to be complicated. A structured workflow that includes:
- Initial rinsing
- Deep cleaning
- Drivetrain maintenance
- Detailing
- Lubrication
- Inspection
- Smart storage
can dramatically improve the lifespan and performance of your bike.
Modern riders are also recognizing that maintenance and security now go hand in hand. Cleaning systems, protective detailing tools, and discreet tracking solutions all contribute to a smarter ownership experience.
Whether you ride mountain bikes, gravel bikes, road bikes, or commuter bikes, consistent care keeps your bike ready for the next ride while helping you avoid unnecessary repairs and expensive replacements.
A clean bike is not just about appearance. It is about performance, protection, reliability, and confidence every time you ride.